
One very powerful tool that Magento Enterprise offers is the ability to segment customers so that you can offer them a personalized shopping experience. Here is a quick screen shot guide to help you setup customer segmentation, then display unique banners to those segments.
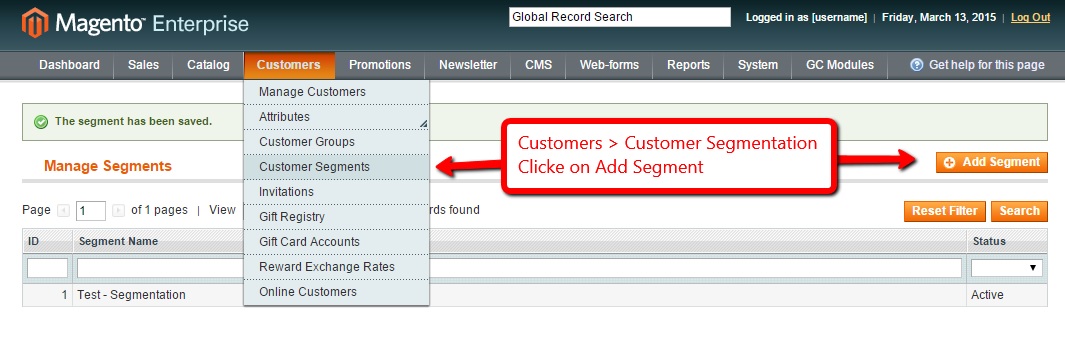
(Step 1) Log into the Magento admin and mouse over Customers in the main menu. Select Customer Segments, then click on Add Segment.
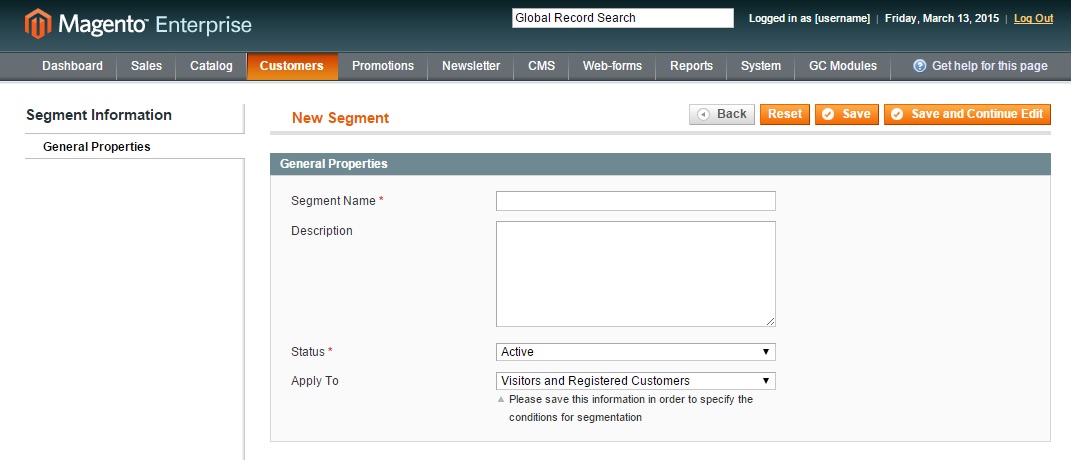
(Step 2) Fill in the Segment Name. A segment name should use a simple naming convention which will make it easy for you to manage multiple segments in the future. An example of a segment name might be “Customers who spent over $1,000” or “Customers who purchased _______”. A description is not required, but it is good practice to fill in the description so you remember what the segment is targeting. For Apply To, you can restrict the segment to apply to different user levels within Magento (i.e. Visitors, Registered Customers or any other custom user level you create). Once you are done updating these settings, make sure you click on Save and Continue Edit.
(Step 3) Once you save, you will now see two new tabs display on the left navigation (Conditions and Matched Customers). Under the Conditions tab, you will setup the conditions you want which will determine the criteria for this specific segment. In the below example I setup a segment that would target all customers who purchased a product within category 3 and category 48. In this example, category 3 is the category ID for the product type category. Category 48 is the category ID for the brand of that product because this website uses categories for brands.
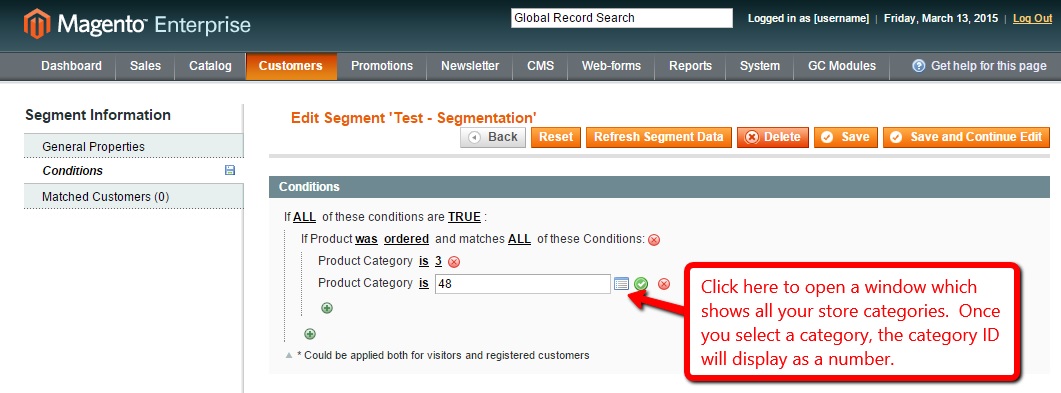
When setting up conditions, you have a lot of attributes that you can select from so condition statements are very flexible. Just spend time playing with conditions because the terminology is not as intuitive as you might think. For example, if you want to target all customers who purchased a specific product (like the example above) you will have to select the Product information > Product History condition, then you can modify it to match the example above. If you want to target customer who viewed a specific product, you would also use the Product information > Product History condition. Here is a list of all the conditions you can select from:
- Customer*
- Created At
- Date of Birth
- Default Bill Address
- Default Shipping Address
- First Name
- Gender
- Group
- Last Name
- Newsletter Subscription
- Store Credit
- Shopping Cart*
- Shopping Cart Total*
- Number of Cart Line items*
- Products Quantity*
- Product information*
- Product List*
- Product history*
- Sales
- Order address
- Sales amount
- Number of orders
- Purchased Quantity
*Can be applied to both visitors and registered customers
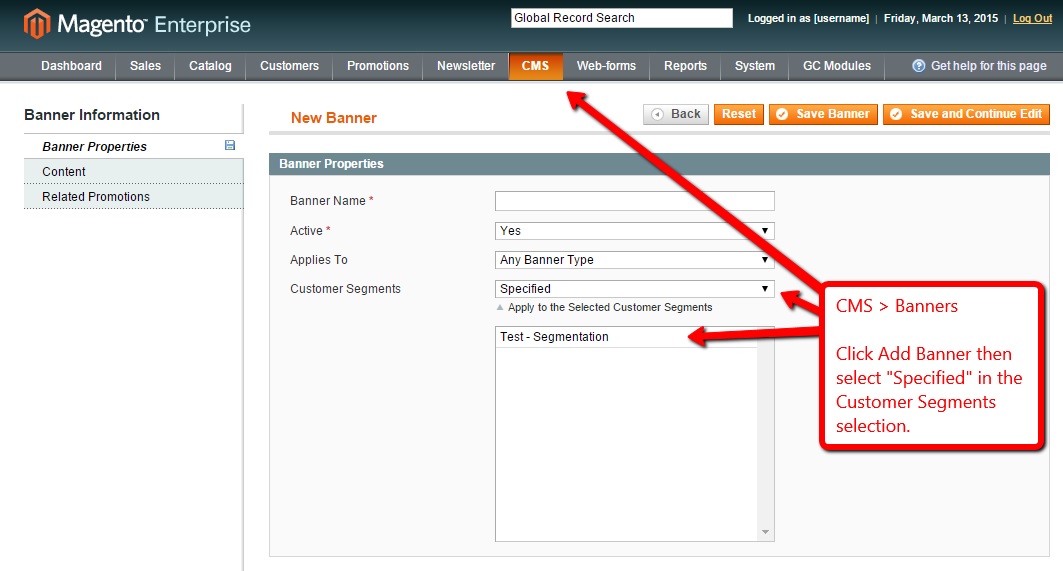
(Step 4) Once you have your segment(s) defined, you can then create banner content to display throughout your site which will only show up for customers within a certain segment. To do that, go to CMS > Banners and create a new banner or select a banner that already exists. Within the Banner Properties page, under Customer Segments, change the selection from the default setting of ALL to Specified. When you do that a list of your segments will display so you can select the specified segment that will see that banner.

- COVID-19 Has Forced Many Business To Ask, How Do I Start Selling Online? - May 25, 2020
- Applying AI Technology To Taco Bell - January 25, 2020
- ONWARD 2018 Taco Bell Brand Award - November 11, 2018
One Response
3englishwoman
Comments are closed.